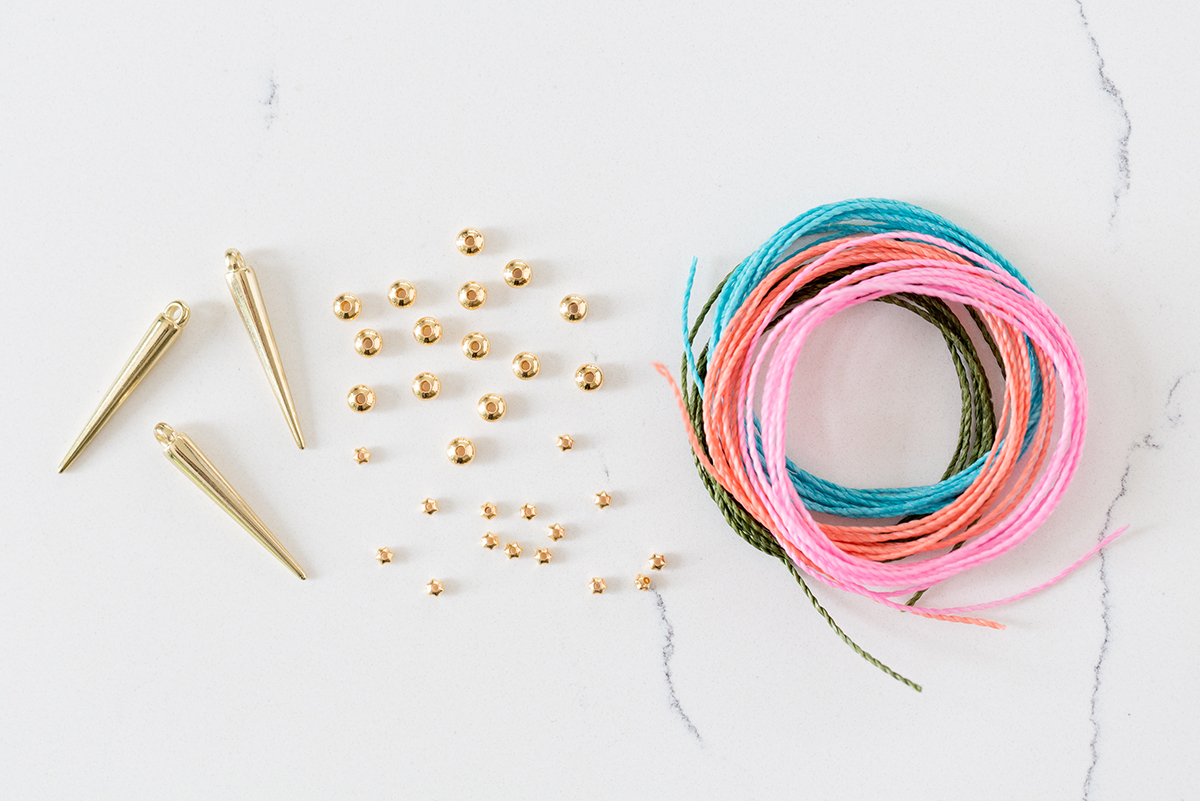
You’ll need:
- scissors
- lighter or glue
- tape or clipboard
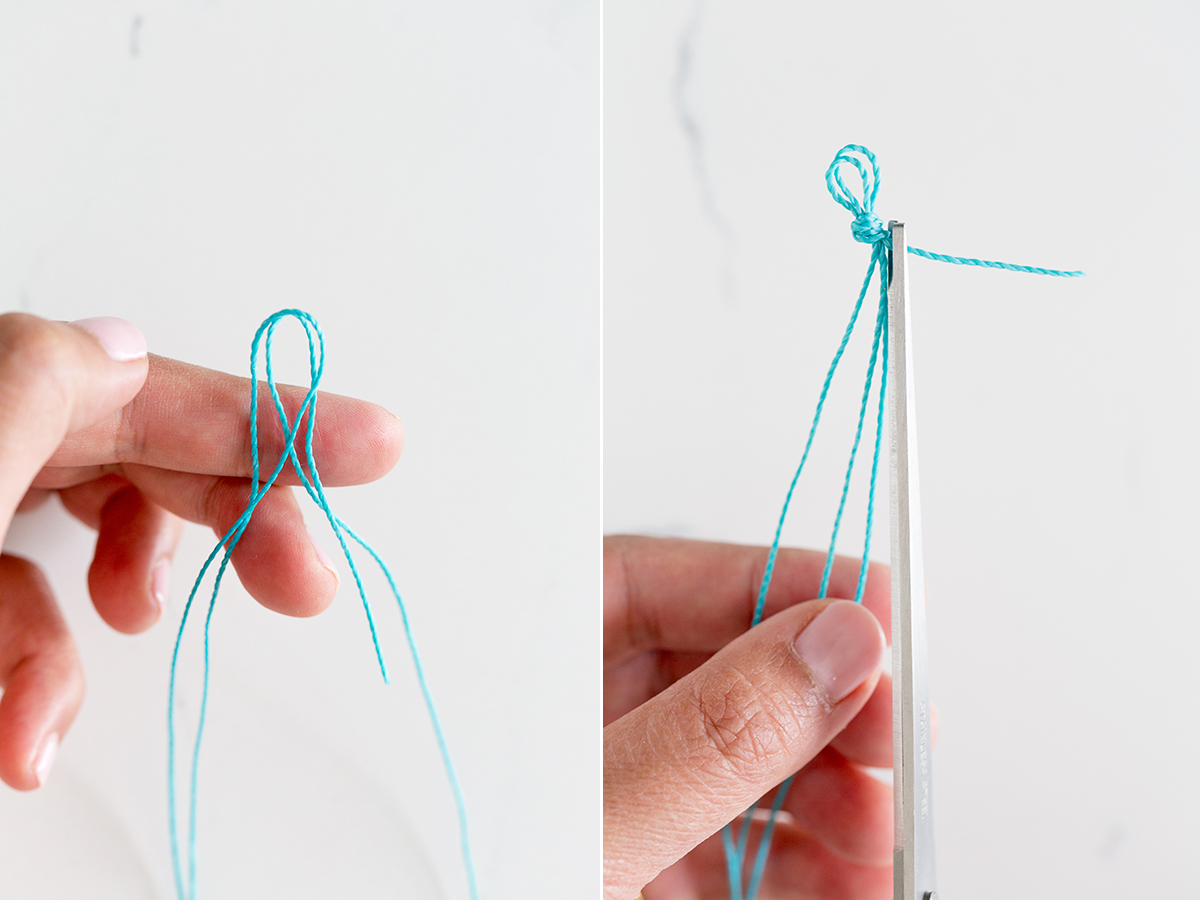
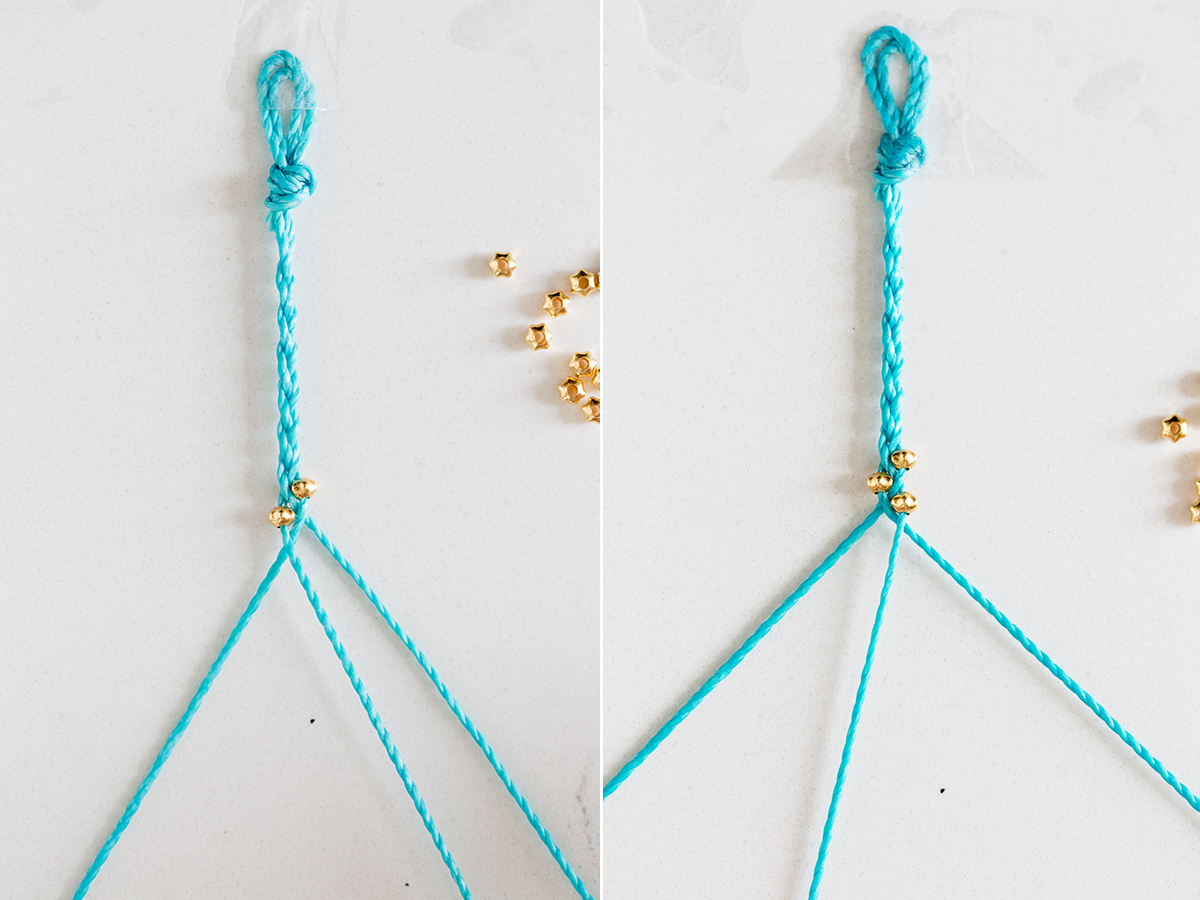
Divide the waxed cord in half and cut. Fold one of the cut pieces in halfand fold the two pieces in half. Gather the two folded sides and tie them into a knot, leaving a quarter of an inch of loop. Snip off the extra fourth strand at the bottom of the knot, leaving 3 equal strands of wax cord.
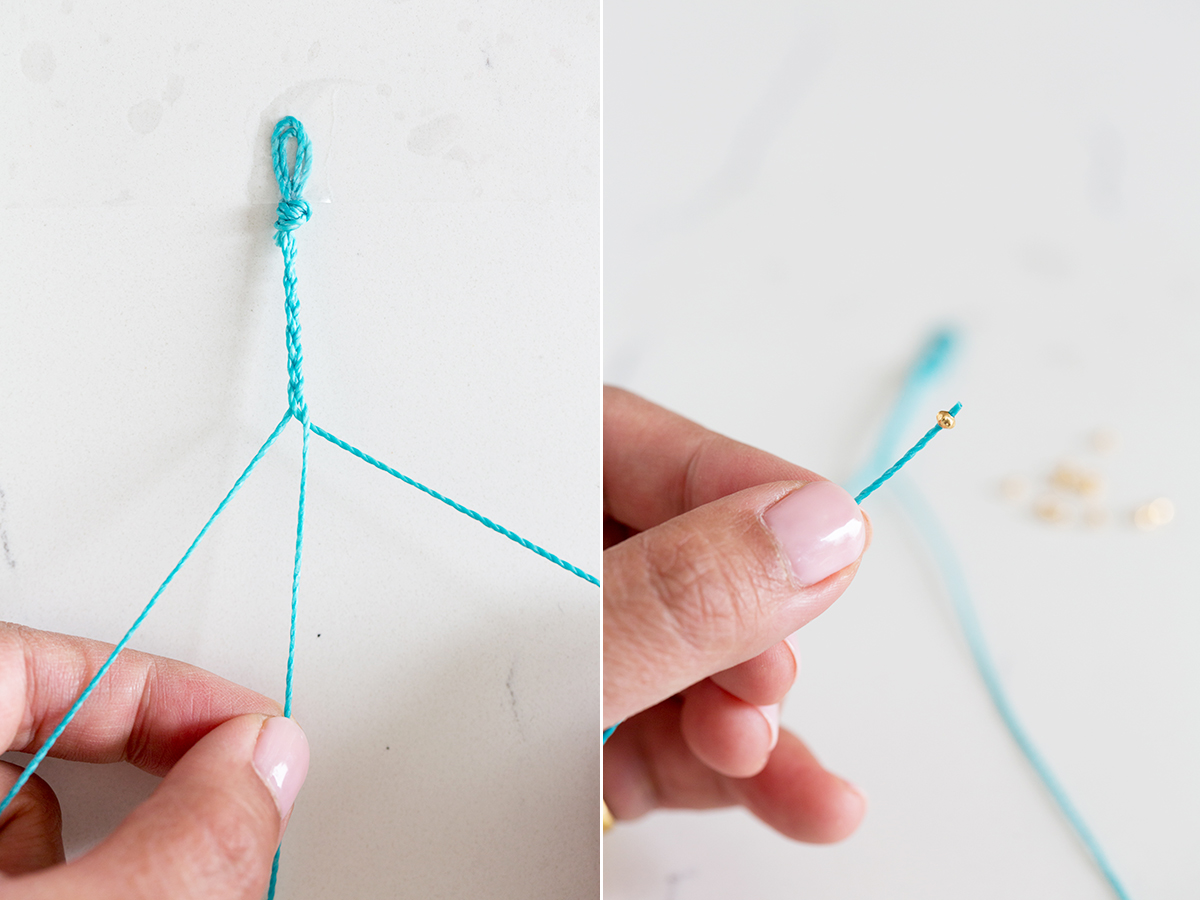
Tape the loop onto a flat surface. I like to use a clipboard to keep it in place. Start braiding the strands. After about an inch, you can start braiding in the beads. Thread a bead onto the outer right strand.
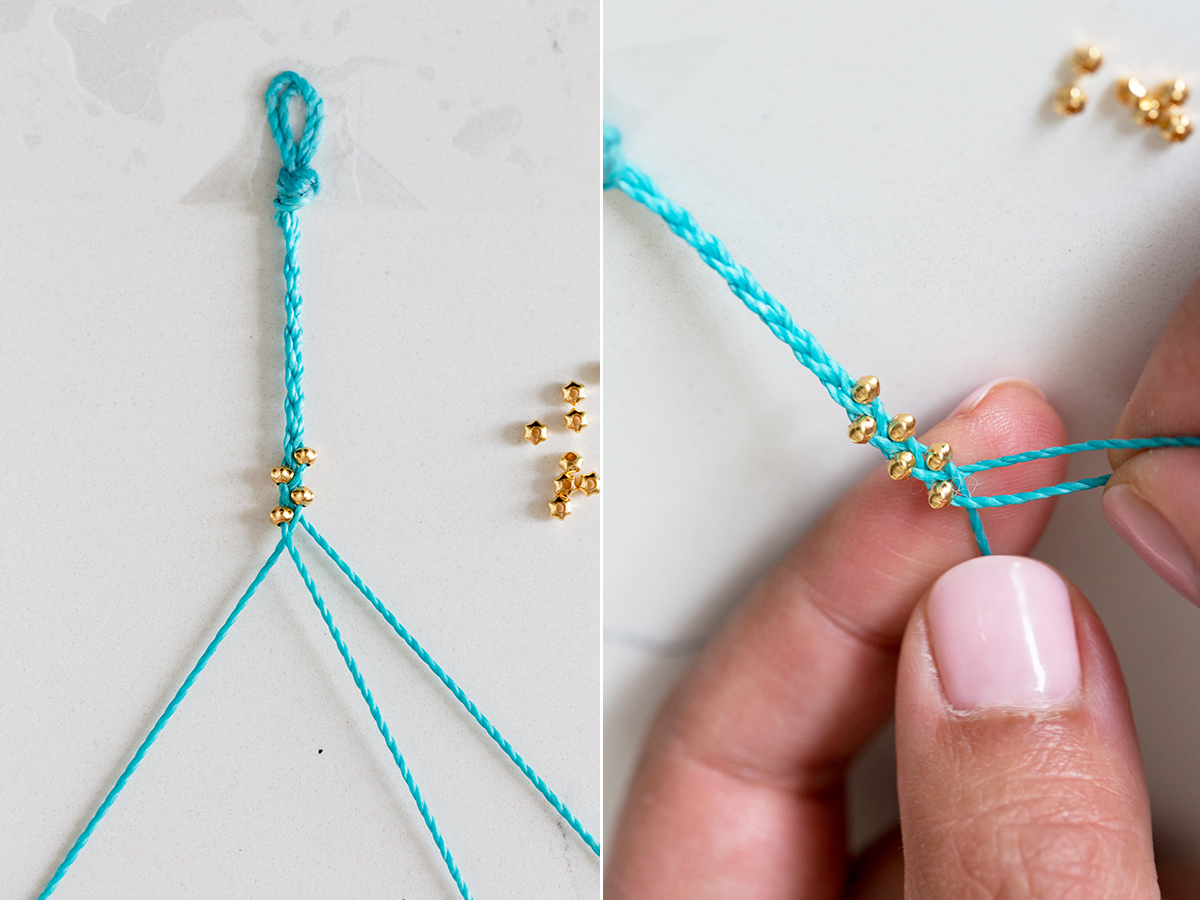
Push the bead against the base of the braid and cross the right strand over the middle.
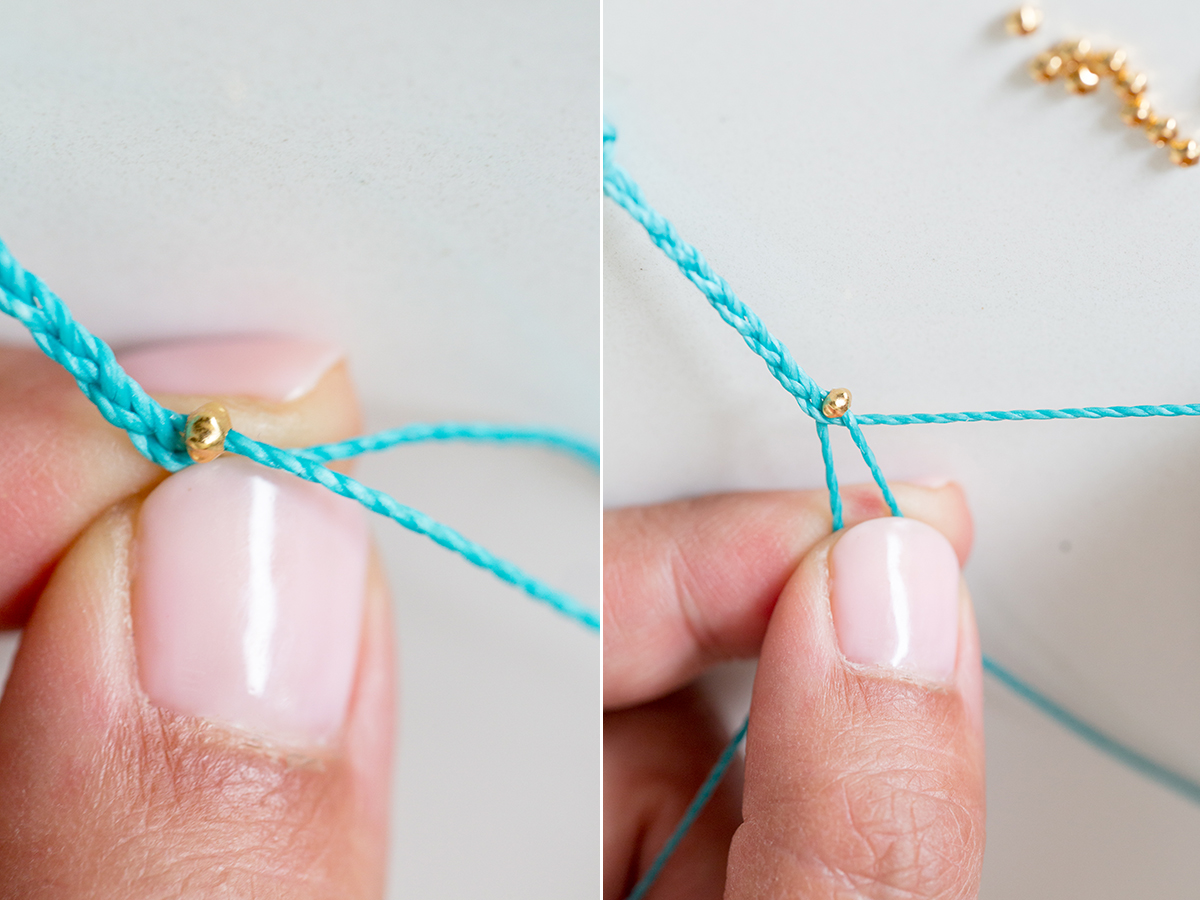
Now thread another bead onto the outer left strand. Push it to the base of the braid and crossover. (Side note: the waxed cord allows the braid to stay in place, making it easier to braid in beads)
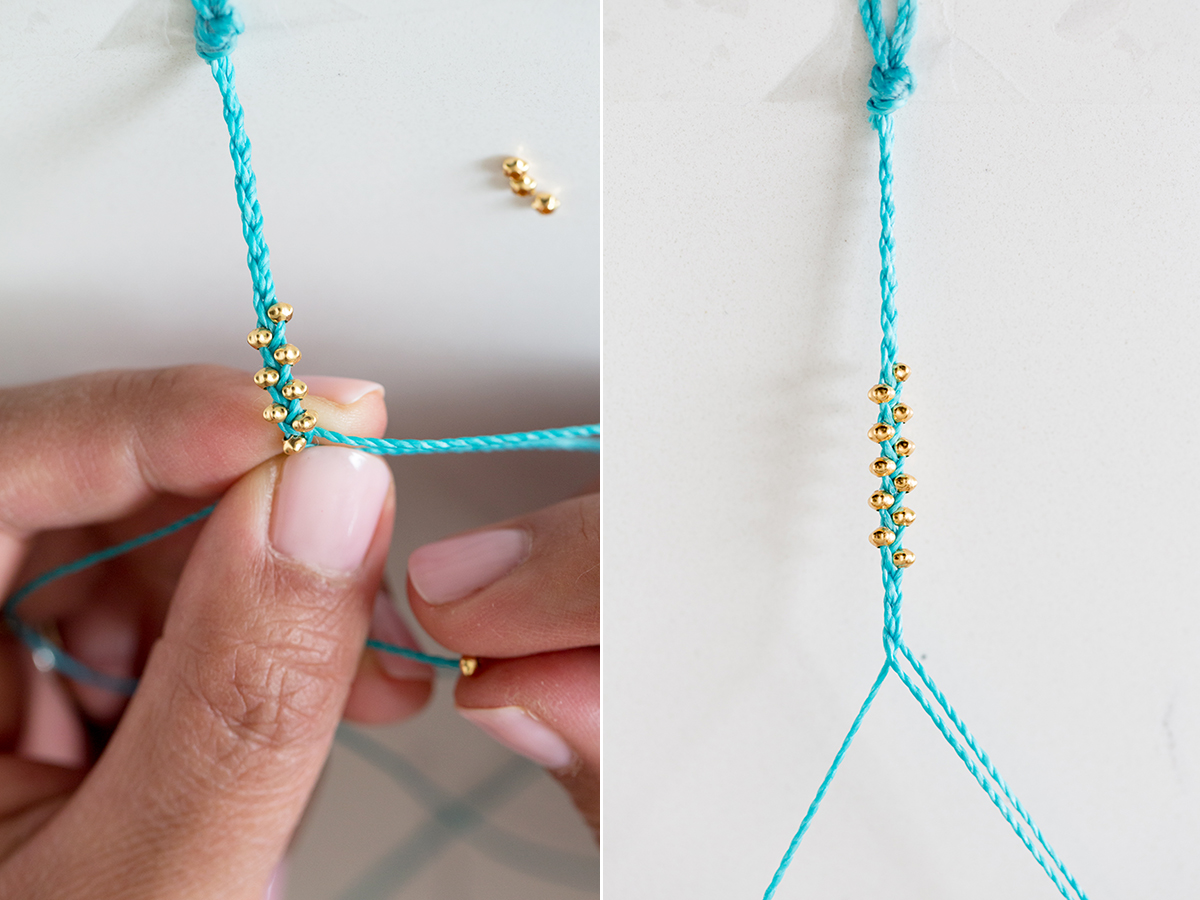
Keep a finger at the base of the braid, holding the beads in their place and keeping the braid tight. Continue threading on beads before each working strand is crossed over.
After adding a few beads, continue braiding normally . . .
Measure the bracelet around the wrist so you know when to stop braiding. Thread the end of the bracelet through the loop.
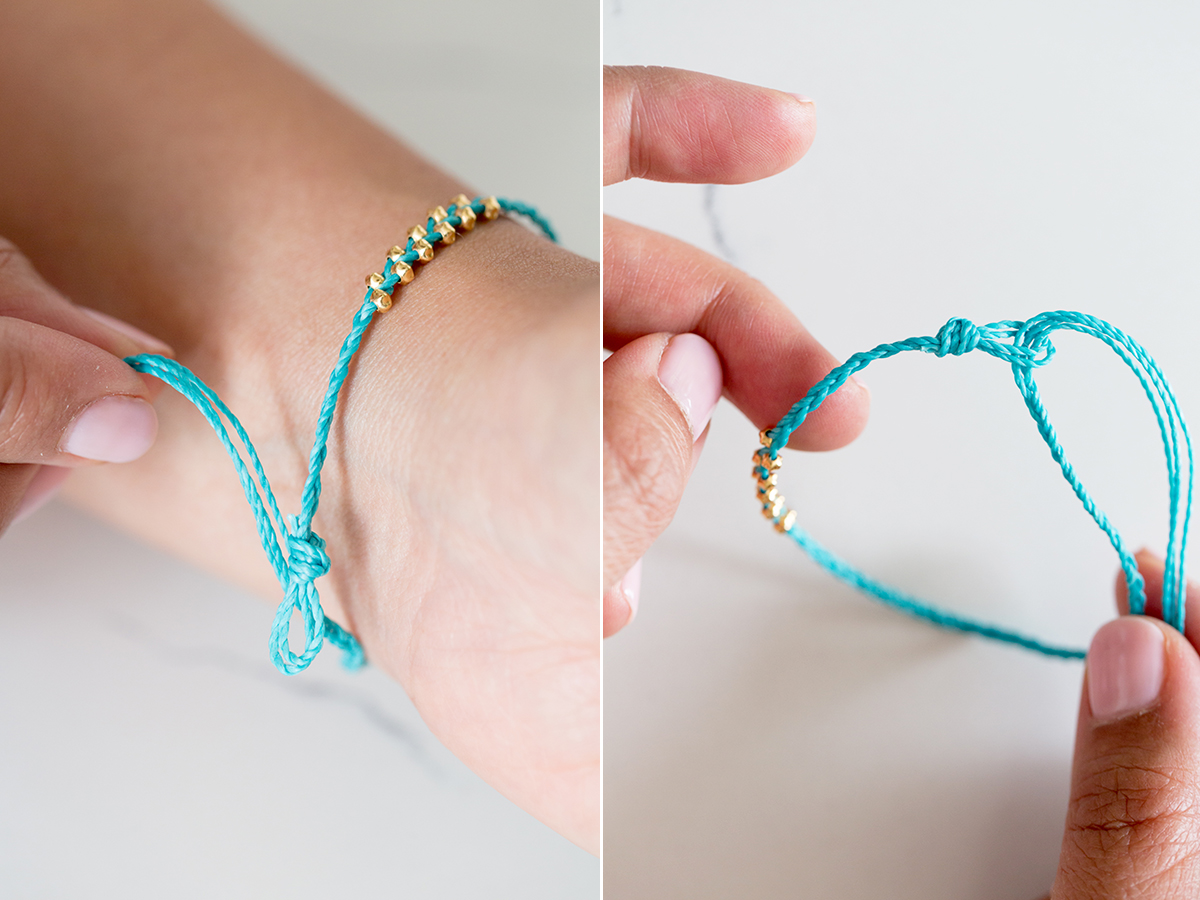
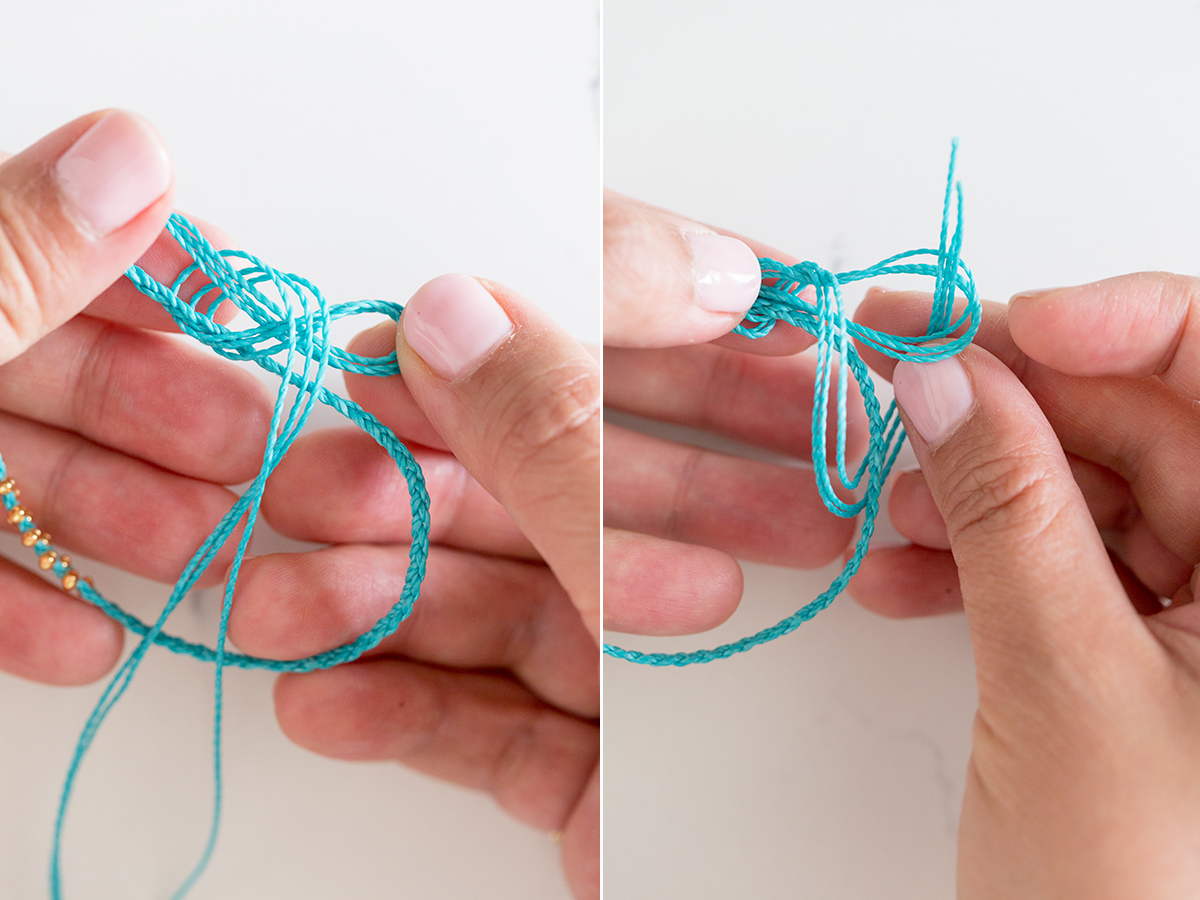
To make a sliding knot, fold an inch of cord back on itself, creating a zig zag. Bend another inch over the zig zag, to create a backwards S.

While holding your backwards S, wrap the tail of the bracelet once around the middle of the S, towards you. Push the ends through the backside of the right loop.
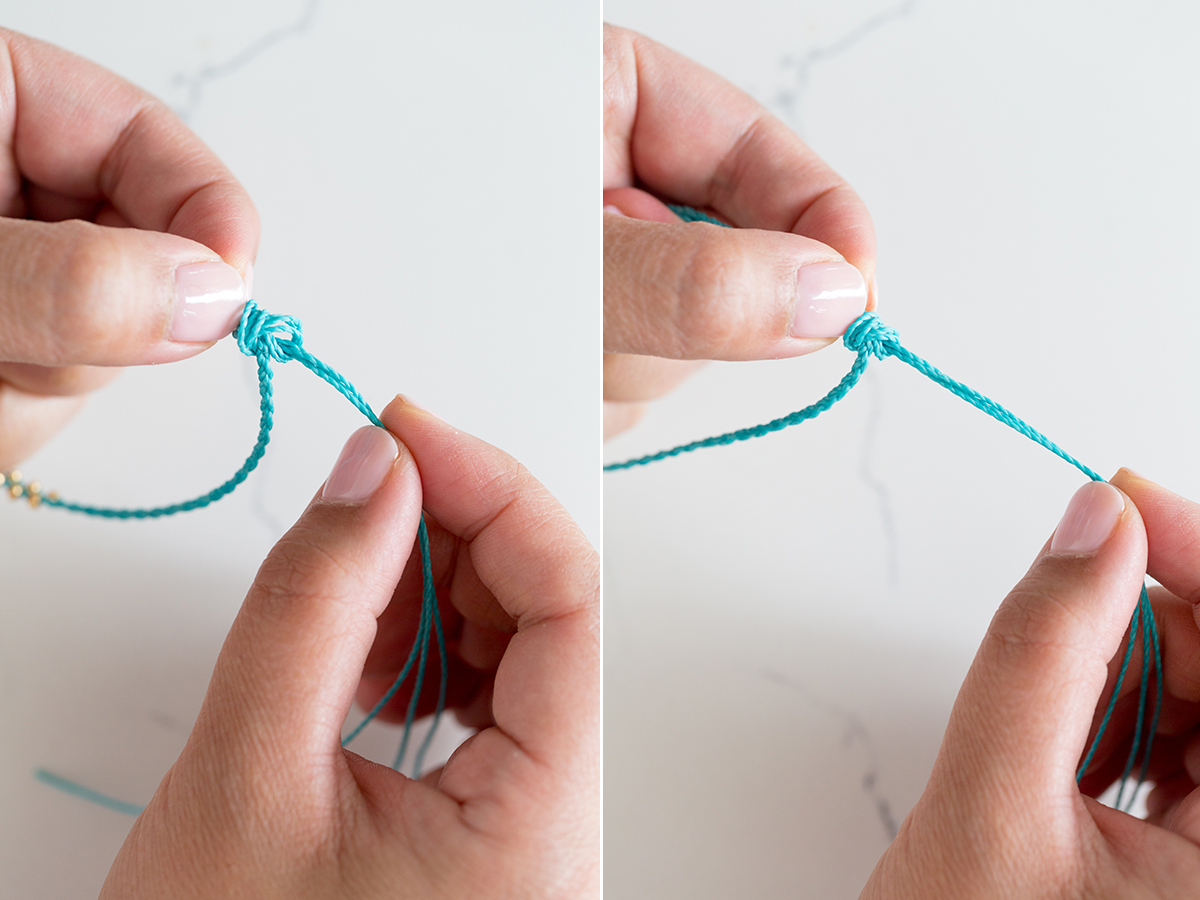
While holding onto the strands with your left hand, pull the tail until the coil start closing. Push the coil with your left fingers until the coil is closed and knot is tight. Test the sliding knot but pushing it long the bracelet to tighten and loosen.
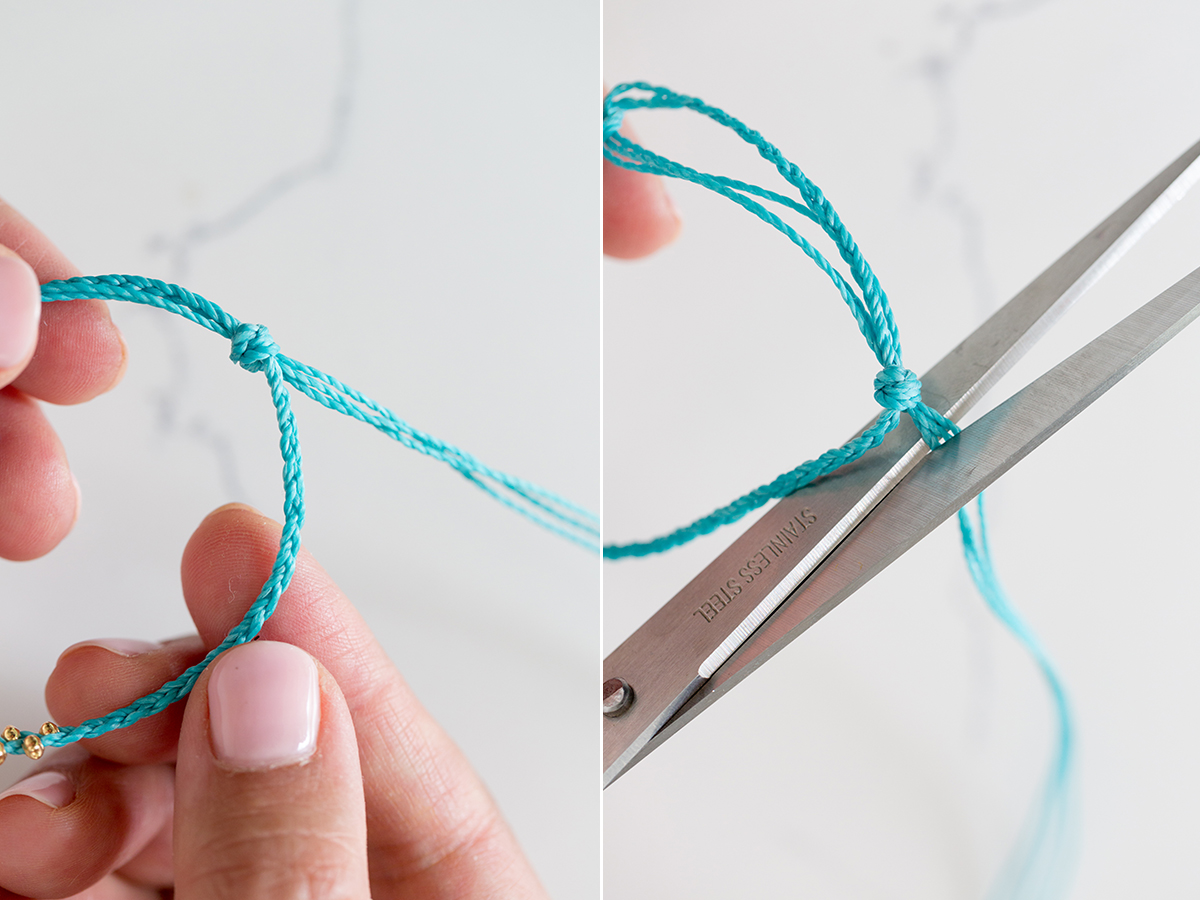
Snip away any excess cord.
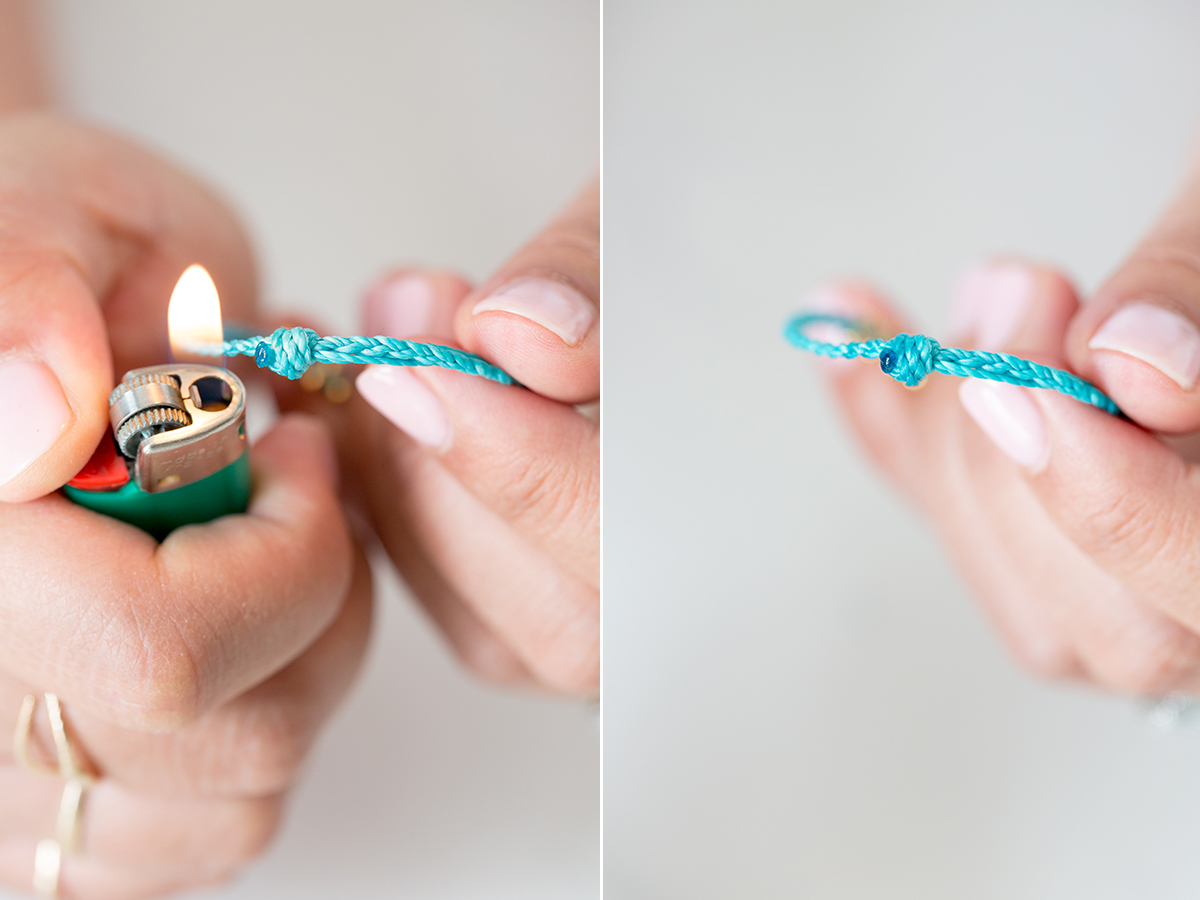
Carefully burn the ends to seal.
You can also thread beads on just one side, in which case you would just always add a bead on the left or right working strand. You can also try beading on the larger beads every other crossover to keep them more spaces apart.
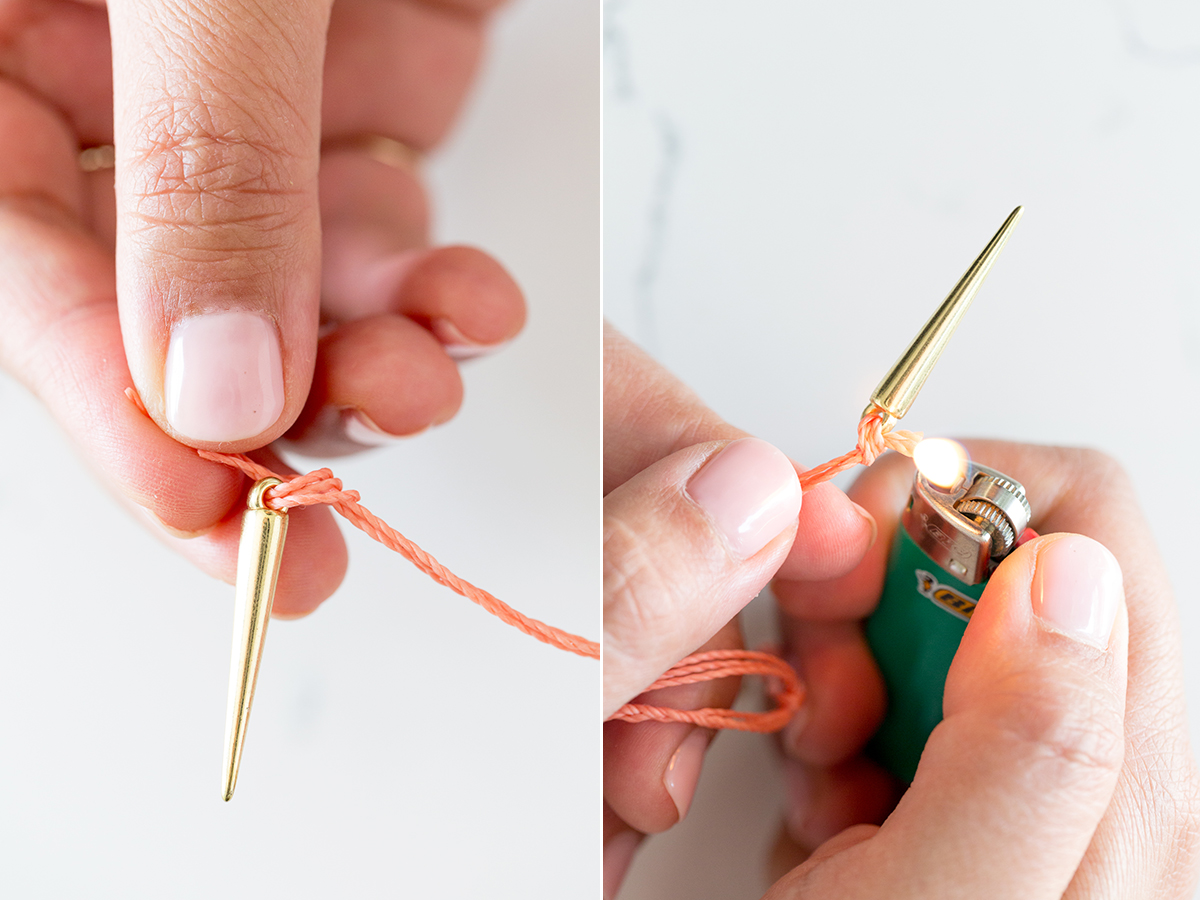
If you want to add a spike charm, leave the cords uncut after making your sliding knot. Slip the ends of the cords through the spike.
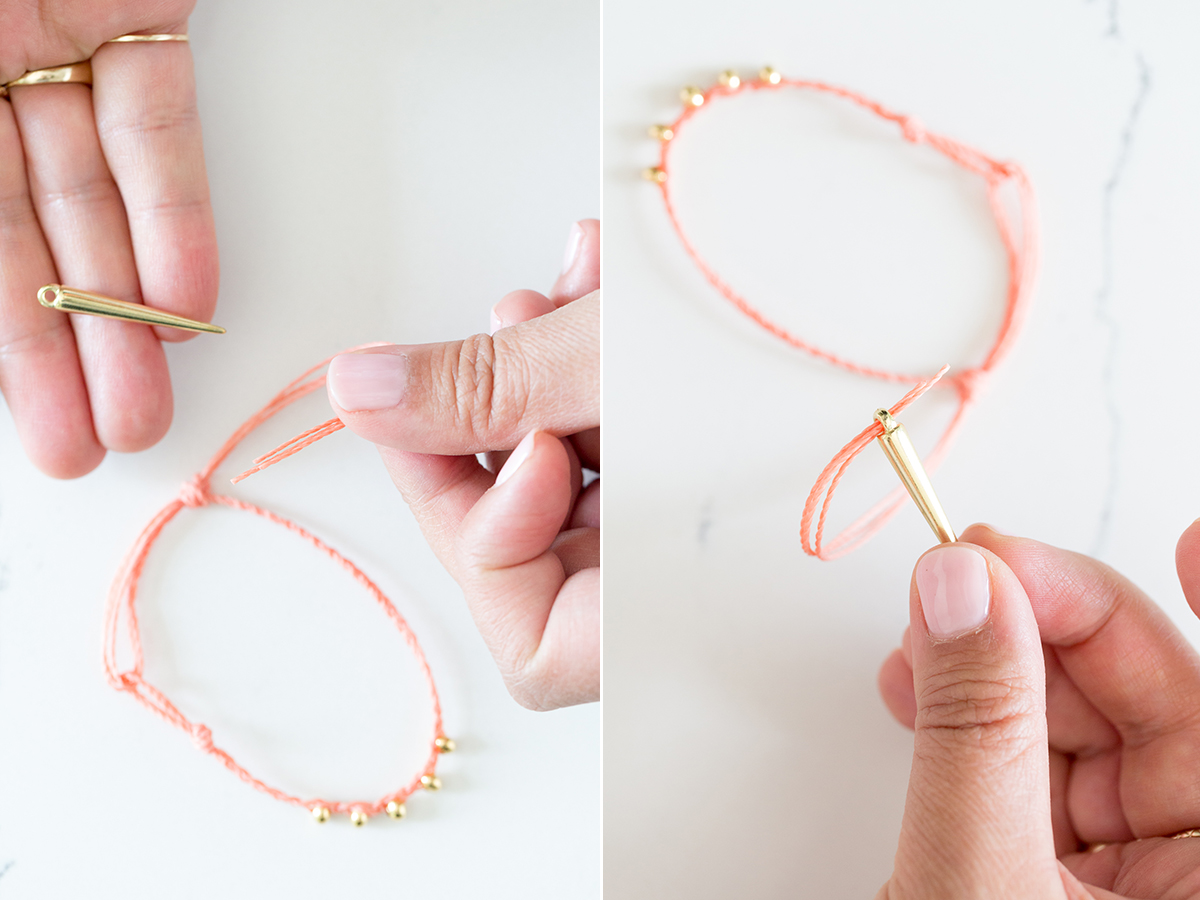
Tie into a knot and burn the ends to seal.
No comments:
Post a Comment