MY SKINCARE ROUTINE !!!
Showing posts with label Beauty. Show all posts
Wednesday, January 9, 2019
THE BENEFITS OF TOMATO FOR SKIN
Hiii guys!!! how are ya?? Today I want to share some beauty tips again about the benefits of tomato for our skin. Hopefully you guys enjoy reading and follow the tips.
Tomatoes are one of the fruits that are rich in vitamins and the benefits of tomatoes for the face are no doubt. Fruit rich in vitamin C is widely used to cope with the face of acne, which is to make it a face mask. These tomatoes are much sought after by the public for their facial treatment because it is easier to find and its use is not complicated. In addition, the tomato can also make healthy face skin always do not have to always go to the salon because treatment with tomato fruit is more than okay and potent, especially for the problem of acne skin.
These are 7 tomato tips to treat your face problems.
1. Scratch open pores
1 tablespoon tomato juice and mix with 4 drops of lemon juice. Apply to the skin and wash your face with warm water to remove open pores.
2. Remove acne
This is another way of eliminating acne in your face by using tomato. Destroy and squeeze tomatoes and rub on the skin. Leave for 1 hour and rinse with water for a good moisture effect. Frequent use of acne can shrink more effectively.
3. Remove black spots
Divide the tomata and place it on the black spot area and the effect of black notes on the skin is diminished.
4. Remove excess oil on the face.
First of all, you need to grind tomatoes and cucumbers. Apply on face using cotton. If you do this often, the oil on your face will decrease.
5. Lighten the skin
Sprinkle tomatoes. Mix tomatoes with aloe vera gel. Put on your face like a mask and leave for 15 minutes. After 15 minutes, wash your face with cold water.
6. Avoid dull skin
Mix the buttermilk (original) and tomato, to make a mask. Let the mask crush your face for 20 minutes and wash your face with warm water.
p.s: Buttermilk has a good source of protein for cooling the skin.
7. Remove scarring acne
Cool the tomatoes in the freezer. Remove the tomatoes from the freezer and leave for 5 minutes. Cut tomatoes into two and rub on your whole face.
WHY YOU SHOULD ADD TONER TO YOUR SKINCARE ROUTINE
Hiiii Guys how are yaaa?!!! Today i want to share some beauty tips why you should add toner to your skin. So ENJOYYYY!!!!
Toner are most helpful necessary for people with oily or acne-prone skin, or for people who want extra cleansing after wearing makeup or other heavy skin product such as sunscreen.
That's not only toner can do, this are the other benefits of using toner:
1. It shrinks pores
Applying a small amount of toner to soft cotton ball or pad and gently blotting and wiping your face with it. It will remove oil and give the appearance of smaller pores.
2. It restores your skin pH balance.
Our skin is naturally acid, typically with pH balance of between five and six . But that balance can get out of whack after cleansing due to the alkaline nature of soap. When this happens, your skin needs to work overtime to return to its normal levels (and that may result in oil), but using a toner can help restore this balance quickly.
3. It adds a layer of protection
Toners can help close pores and tighten cell gaps after cleansing, reducing the penetration of impurities and environmental into the skin. It can even protect and remove chlorine and minerals present in tap water.
4. It acts like moisturizer.
Some toner are humectants, which means they help to bind moisture to the skin.
5. It refreshes skin
Toner can also be used in lieu of washing your skim when it's oily or dirty. It will leave your skin revitalized even when you're on the go.
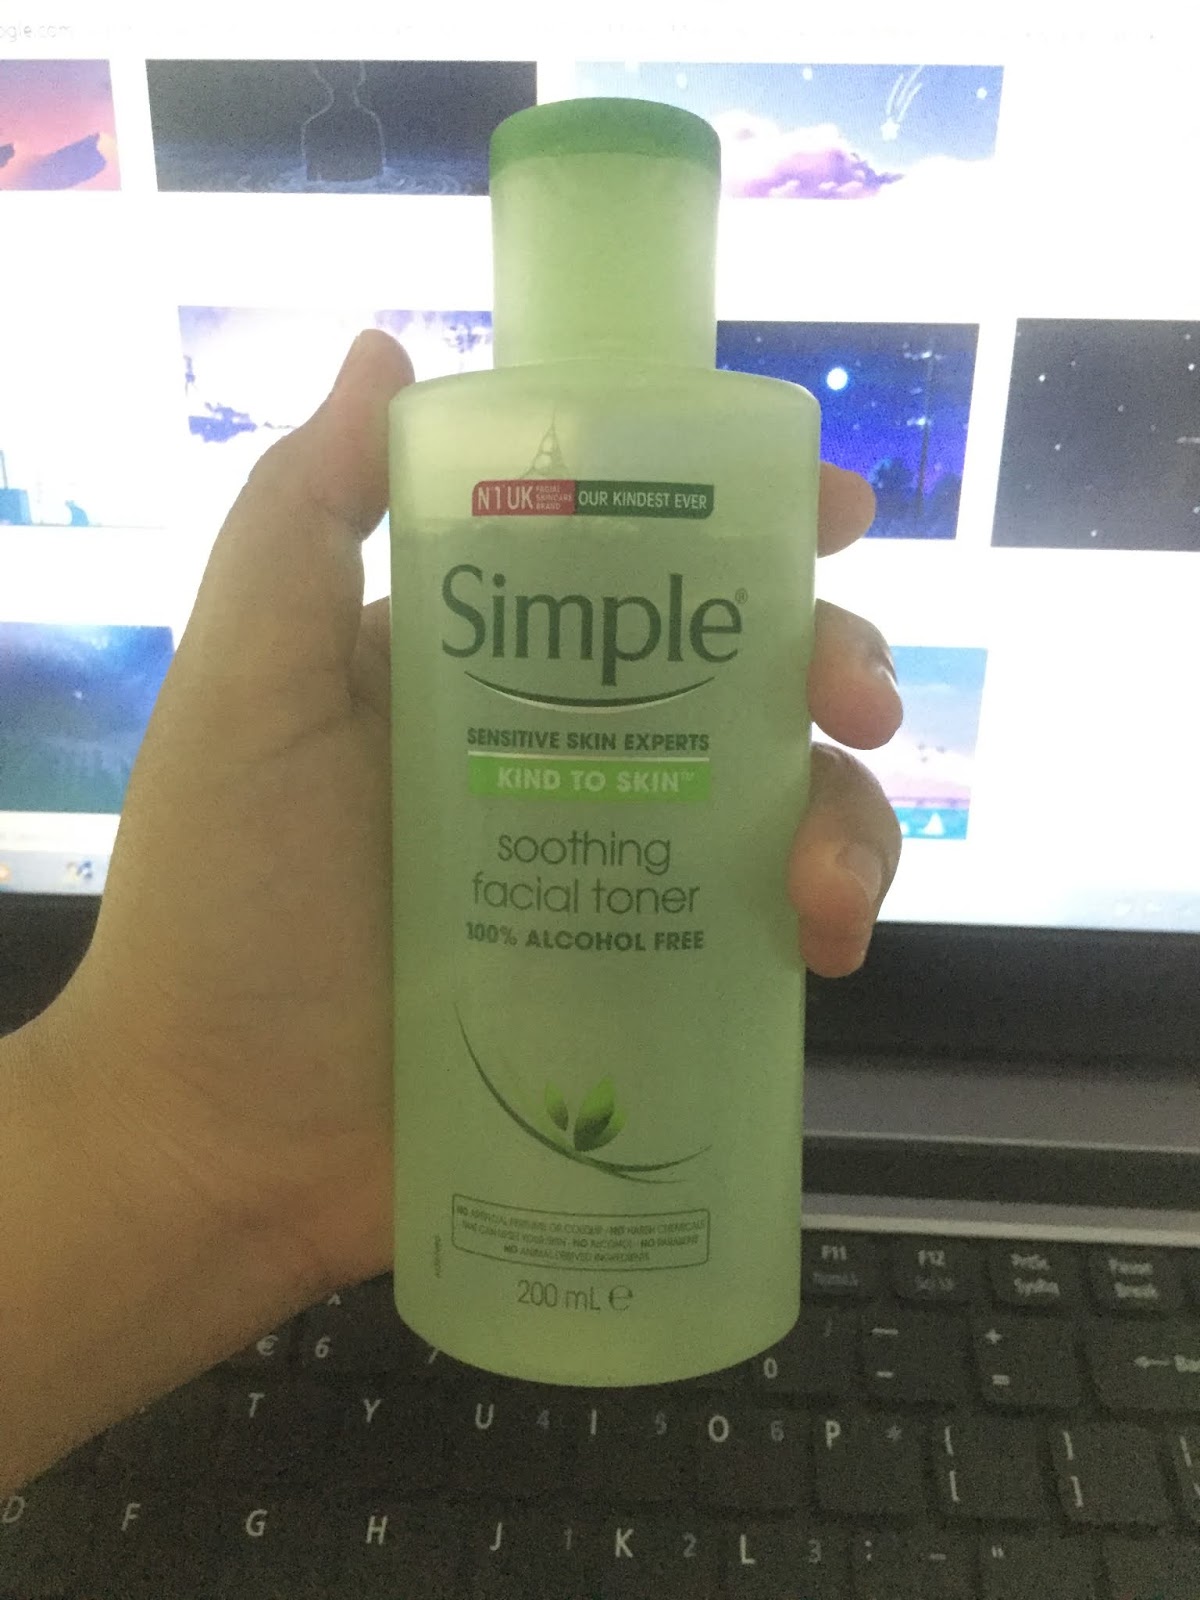
The toner I usually used for my facial skin on a daily basis is the SIMPLE toner.
what I like about this brand is because it can remove the dirt on your skin and makes your skin look glowing.
Toner are most helpful necessary for people with oily or acne-prone skin, or for people who want extra cleansing after wearing makeup or other heavy skin product such as sunscreen.
That's not only toner can do, this are the other benefits of using toner:
1. It shrinks pores
Applying a small amount of toner to soft cotton ball or pad and gently blotting and wiping your face with it. It will remove oil and give the appearance of smaller pores.
2. It restores your skin pH balance.
Our skin is naturally acid, typically with pH balance of between five and six . But that balance can get out of whack after cleansing due to the alkaline nature of soap. When this happens, your skin needs to work overtime to return to its normal levels (and that may result in oil), but using a toner can help restore this balance quickly.
3. It adds a layer of protection
Toners can help close pores and tighten cell gaps after cleansing, reducing the penetration of impurities and environmental into the skin. It can even protect and remove chlorine and minerals present in tap water.
4. It acts like moisturizer.
Some toner are humectants, which means they help to bind moisture to the skin.
5. It refreshes skin
Toner can also be used in lieu of washing your skim when it's oily or dirty. It will leave your skin revitalized even when you're on the go.
The toner I usually used for my facial skin on a daily basis is the SIMPLE toner.
what I like about this brand is because it can remove the dirt on your skin and makes your skin look glowing.
HOW TO WASH YOUR FACE CORRECTLY
Hiii guysss!!!? how are ya? So today I want to share some tips on how to was your face correctly. It should be the right step using cleanser, toner and moisturizer. Every woman needs to do these 3 things when making a facial treatment. Without these 3 things, it's just as incomplete. But not everyone know the correct usage steps, or how to wash your face using the right facial cleanser, toner and moisturizer. It is important to know that your face is no longer contaminated and dirty.
Let me show you guys the right steps to use cleanser, toner and moisturizer.
#Step 1
Wash hands first thoroughly. Never touch your face when your hands are dirty.
#Step 2
After that, take a facial cleanser, then wash your face by following the correct sequence as shown below. You should emphasize the fore and T-zone. Massage slowly and do not press your face to hard.
#Step 3
Before you put facial cleanser on your face you will need to wash your face with warm water first. After that, wash your face with cold water. This is because, when you wash your face with warm water, the pores in your face will open and then wash your face with cold water to close the pores on your face.
#Step 4
Wipe your face with a clean towel. It would be nice if you could have a special towel for the face only.
#Step 5
Now for the toner. Take cotton, put a bit of your toner. No need to pinch in whole cotton, just a little bit enough. Wipe slowly, once again pay attention to the fore and T-zone. Apply toner to your face so that you can see the impurities in the cotton. Let the face dry and do not wash the toner.
#Step 6
Finally, use moisturizer. Put it all over the face and massage slowly. DONE! ^^
These are the one of the important tips that I want to share with you guys. Hopefully all of you can follow the steps correctly. Thank you and ENJOYYYY!!!! ^^
Let me show you guys the right steps to use cleanser, toner and moisturizer.
#Step 1
Wash hands first thoroughly. Never touch your face when your hands are dirty.
#Step 2
After that, take a facial cleanser, then wash your face by following the correct sequence as shown below. You should emphasize the fore and T-zone. Massage slowly and do not press your face to hard.
#Step 3
Before you put facial cleanser on your face you will need to wash your face with warm water first. After that, wash your face with cold water. This is because, when you wash your face with warm water, the pores in your face will open and then wash your face with cold water to close the pores on your face.
#Step 4
Wipe your face with a clean towel. It would be nice if you could have a special towel for the face only.
#Step 5
Now for the toner. Take cotton, put a bit of your toner. No need to pinch in whole cotton, just a little bit enough. Wipe slowly, once again pay attention to the fore and T-zone. Apply toner to your face so that you can see the impurities in the cotton. Let the face dry and do not wash the toner.
#Step 6
Finally, use moisturizer. Put it all over the face and massage slowly. DONE! ^^
These are the one of the important tips that I want to share with you guys. Hopefully all of you can follow the steps correctly. Thank you and ENJOYYYY!!!! ^^
Monday, January 7, 2019
HOW TO GET RID OF ACNE WITH APPLE CIDER VINEGAR
Helloo hellooo guysss!!! how are ya? So today I want to share a tips about how to get rid of acne scars with apple cider vinegar.
Why does apple cider vinegar works on our skin?
Apple cider vinegar possesses antimicrobial properties that help in keeping acne at bay. The anti-inflammatory properties of apple cider vinegar reduce the inflammation and reddening of your acne scars and help them to fade. It may be drying, so make sure to moisturize.
When we are talking about the benefits of apple cider vinegar for our skin, of course the material needed is:
1. Apple cider vinegar
2. Honey - is naturally antibacterial, so it’s great for acne treatment and prevention.
What you have to do?
Why does apple cider vinegar works on our skin?
Apple cider vinegar possesses antimicrobial properties that help in keeping acne at bay. The anti-inflammatory properties of apple cider vinegar reduce the inflammation and reddening of your acne scars and help them to fade. It may be drying, so make sure to moisturize.
When we are talking about the benefits of apple cider vinegar for our skin, of course the material needed is:
1. Apple cider vinegar
2. Honey - is naturally antibacterial, so it’s great for acne treatment and prevention.
What you have to do?
- Mix a 1 tablespoon of apple cider vinegar with two tablespoons of honey.
- Add a little water to this mixture to dilute it and mix well.
- Using a cotton pad, apply this mixture to the entire face or only the acne scars.
- Leave it on for 10 to 20 minutes and wash it off with water
You must do this once daily or every other day for a better result. Enjoy!!!
Tuesday, December 11, 2018
SKINCARE ROUTINE THINGS
Does it really matter when and in what order you apply your skin care products? We asked because we never felt the need to worry about the order in which we eat our food. After all, don’t we absorb the same amount of sugar in sweets even if we eat them last? So we asked the skin experts the same question we ask ourselves every time we buy a new skin care product or add another step to our routine: In what order should I apply my skin care products and does it matter?
Your Daytime Regimen
The morning routine is all about protection from the sun, pollution and the elements, according to Dr. Rogers, so leave your peel pads and treatment products, like retinol, for night.
STEP 1: CLEANSER
In the morning, start by splashing your face with warm water or, if you must, wash with a gentle face cleanser designed for your skin type.
STEP 2: TONER
Most people choose to skip toners, partly because there’s a lingering assumption that most toners are harsh and irritate the skin. Fortunately, that’s not the case anymore. While they don’t physically “shrink” pores, the new breed of toners can serve multiple purposes, like act as a delivery system for antioxidants, vitamin B derivatives and even toning acids. Additionally, each type of toner is intended for a different skin issue, so it’s important to use the right kind for your skin concern.
However, if you have lived all your life without using a toner and your skin looks healthy, Dr. Rogers says there is no need to start using one. “Toners were created to help return the skin’s pH after it became too basic from harsh soaps,” explains Dr. Rogers. “Face cleansers are now so much better balanced than toners are not a required step for me, particularly in the morning when your face is clean from being washed the night before. Alcohol-based toners contribute to over-drying of the skin by stripping the protective oils, and water-based toners are a poor vehicle for getting active ingredients into the skin.”
STEP 3: ANTIOXIDANT SERUM
Serums are super-concentrated, nutrient-dense treatments that address specific concerns, so it’s better to keep them as close to the skin as possible. There are various serums available on the market today, but for daytime, Dr. Rogers recommends antioxidant serums, which provide a variety of benefits—from blunting your skin’s inflammatory response to neutralizing damage from UV rays and environmental pollutants.
STEP 4: EYE CREAM
According to board-certified dermatologist Annie Chiu, it’s vital to apply an eye cream at least every night, if not twice a day, starting in your 20s. “It’s about maintaining the health and thickness of the eyelid skin. Improving the skin quality in this area early on ensures that the eyelid skin does not easily lose laxity and its smooth appearance later on.”
For best results, consistency is key. “Regular use of eye cream over time will keep the eyelid skin elastic and can improve or prevent against some fine lines or collagen loss. Remember: Nothing is magic. Results don’t occur overnight,” Dr. Chiu adds. “You can further protect the delicate skin around your eyes by choosing an eye cream with SPF or applying sunscreen every day.” Dr. Chiu also advises people to remember to wear sunglasses when outside to protect against UV-light damage and lines that can creep up around the corners of your eyes from squinting.
STEP 5: SPOT TREATMENT
According to Dr. Diane De Fiori, dermatologist at Rosacea Treatment Clinic, prescription medications and acne spot treatments, like serums, need to be applied as close to the skin as possible to maximize their benefits.
As acne spot treatments differ in active ingredients, check your product packaging or consult your dermatologist for the best way to apply it. Prescription-strength benzoyl peroxide, a common acne spot treatment ingredient, has a one- to three-hour working time, according to esthetician and acne specialist Ashley Wiley. “Any cream that comes in contact with it before it has completed its work will likely inhibit the active ingredient from working properly.”
Remember that acne spot treatments can dry out your skin, so always apply only on spots where you need it.
STEP 6: MOISTURIZER
Yes, everyone needs a moisturizer, even if you have oily skin. “Even though your body has its own natural lubricating system consisting of glands that secrete oil (or sebum) to maintain a protective coating against harsh outside conditions and infections, most of us do need extra hydration after the havoc that sun, weather and harsh chemicals wreak on our skin,” explains board-certified dermatologist Sandra Kopp.
Most experts recommend that the best time to apply a moisturizer is while the skin is still damp, so the sooner you go through applying your serum and treatment, the sooner you’re able to lock in much-needed hydration with your moisturizer.
If you’re using an acne spot treatment, you may want to skip those areas when applying your moisturizer to make sure the ingredients in it won’t interfere with the active ingredients in your spot treatment.
Step 7: SUNSCREEN
Sunscreen should be the last step in your daytime skin care routine if you’re using a physical or mineral sunscreen, which works by physically blocking the UV rays. This step becomes tricky when you’re using a chemical sunscreen.
Dr. Rogers explains: “Chemical sunscreens have to be absorbed into the skin to be effective, so applying after your moisturizer will delay and hinder that. However, if you apply your chemical sunscreen before your moisturizer, your moisturizer will not work as well either because the skin is coated with chemical sunscreen.”
So to get around this, and for many other reasons, Dr. Rogers always recommend using a physical sunscreen with zinc and to apply it after your moisturizer. “Zinc is safe, effective and provides the broadest protection against UVA and UVB rays.”
As for those who like using chemical sunscreens, try to look for formulas that offer moisturizing benefits, so you can get your daily hydration needs while protecting your skin.
Your Nighttime Regimen
As your skin naturally repairs itself at night, your nighttime routine should be all about treatment and giving your skin what it needs, says Dr. Rogers. “If your skin is looking dull, exfoliate. If it is irritated, hydrate and protect.” Here’s the best order of skin care products to make sure you get the most out of them:
STEP 1: (DOUBLE) CLEANSER
To get rid of the day’s grime, dirt, oil and makeup, some experts recommend removing your makeup first with a dedicated makeup remover before washing your face with a gentle cleanser. Better yet, try double cleansing, which involves using a cleansing oil first to dissolve your makeup and then washing your face again with your regular cleanser.
“The first step is to take off your makeup. This is the step where you would typically use a cleansing oil,” explains cosmetic acupuncturist and herbalist Kathleen Funk. “The second step is to use a face wash to remove all the excess sebum, dirt and makeup you loosened up on the first step. This leaves your skin fresh and perfectly prepped to absorb your skin regimen.”
TIP: If you’re using a physical exfoliant, like a facial scrub, use it in place of your cleanser after removing your makeup.
STEP 2: TONERS, ESSENCES AND BOOSTERS
If you use a toner, apply it as you would in the morning.
At night, some people also like to layer various types of skin care boosters, which you’ll see as either mists, essences, beauty waters or hydrating (hyaluronic acid) serums. These are infused with different active ingredients, but for the most part, the purpose is mainly to hydrate and nourish skin.
Since these are lightweight, almost water-like formulas, apply them after washing your face as you would a toner. “If using both, apply toner then essence,” says Dr. Rogers. “Toner is more to clean and essence is more about delivering a treatment.” If using multiple boosters, same rules apply: apply from thinnest to thickest.
STEP 3: EYE CREAM
Aside from addressing crow’s feet and dark circles, eye creams can also serve to protect your delicate eye area from your other skin care products.
“Generally, you’d want to apply your eye cream before your treatments to protect your eye area against potent ingredients, which could potentially cause irritation,” according to Dr. Rogers.
STEP 4: TREATMENT SERUMS, CREAMS AND PADS
Like the rest of the body, skin does the bulk of its repairing, restoring and regenerating as we sleep. This is why most targeted skin care treatments—like prescription meds (tretinoin, acne and rosacea creams), retinol creams, exfoliative treatments (peel pads and masks) and anti-aging serums (infused with peptides, growth factors and other biologically active ingredients)—are better used at night. However, instead of layering up all your treatment serums and creams, Dr. Rogers suggests choosing your evening treatment depending on your skin’s of-the-moment needs.
“Too many steps just increase the risk of irritation and decrease the likelihood of the desired result,” says Dr. Rogers. “Pick your evening treatment based on what your skin needs that night, not based on what you have in your medicine cabinet. Some nights, it may be just wash, moisturize and bed. There is always tomorrow to give your skin more love.”
Here are other considerations:
- Choose between prescription meds (for acne or rosacea) OR exfoliative treatments (like AHA/BHA pads, peels or detoxifying masks). “If you use both on the same night, you significantly increase your risk of irritating your skin,” warns Dr. Rogers.
- Just like prescription meds, don’t use retinol creams (over the counter and prescription) on the same night as exfoliative treatments.
- Exfoliative treatments: Use these sparingly, one to three times a week.
- Detoxifying/Clay Masks: For most people, once a week is plenty.
STEP 5: HYDRATING MASK OR FACE OIL
If your skin is on the dry side, you may want to add a hydrating cream mask or face oil. Both product types are generally mild and can be typically used as often as your skin needs an extra boost of hydration.
STEP 6: MOISTURIZER OR NIGHT CREAM
Some people use the same moisturizer in the day and at night. However, night moisturizers or night creams are generally thicker and heavier, and designed to be absorbed over the course of several hours.
“Moisturizer, particularly the heavier ones used at night, create a protective coating on the skin to prevent water evaporation while you sleep,” says Dr. Rogers. “Maintaining a high water content in the skin is key for healing and maintaining healthy skin. If you are using the right moisturizer, it should be your last step because nothing is going to get through it.”
Wednesday, November 28, 2018
FACIAL DAY
Holla! today i want to give a feedback about my deep peel facial at Klinik Hana the other day. I had a huge breakouts cause of chickenpox disease. and the doctor suggest me to do this treatment to avoid acne scars on my face. It has a downtime and it quite horrified seeing your face peeling like that?! but i managed to calm over and just take over it. It was a very fun because i can see the difference so much. I'm so happy that i don't have to take more time to get heal. I suggest to whoever had this problem go to this clinic okay? much love, the<3
Subscribe to:
Posts (Atom)